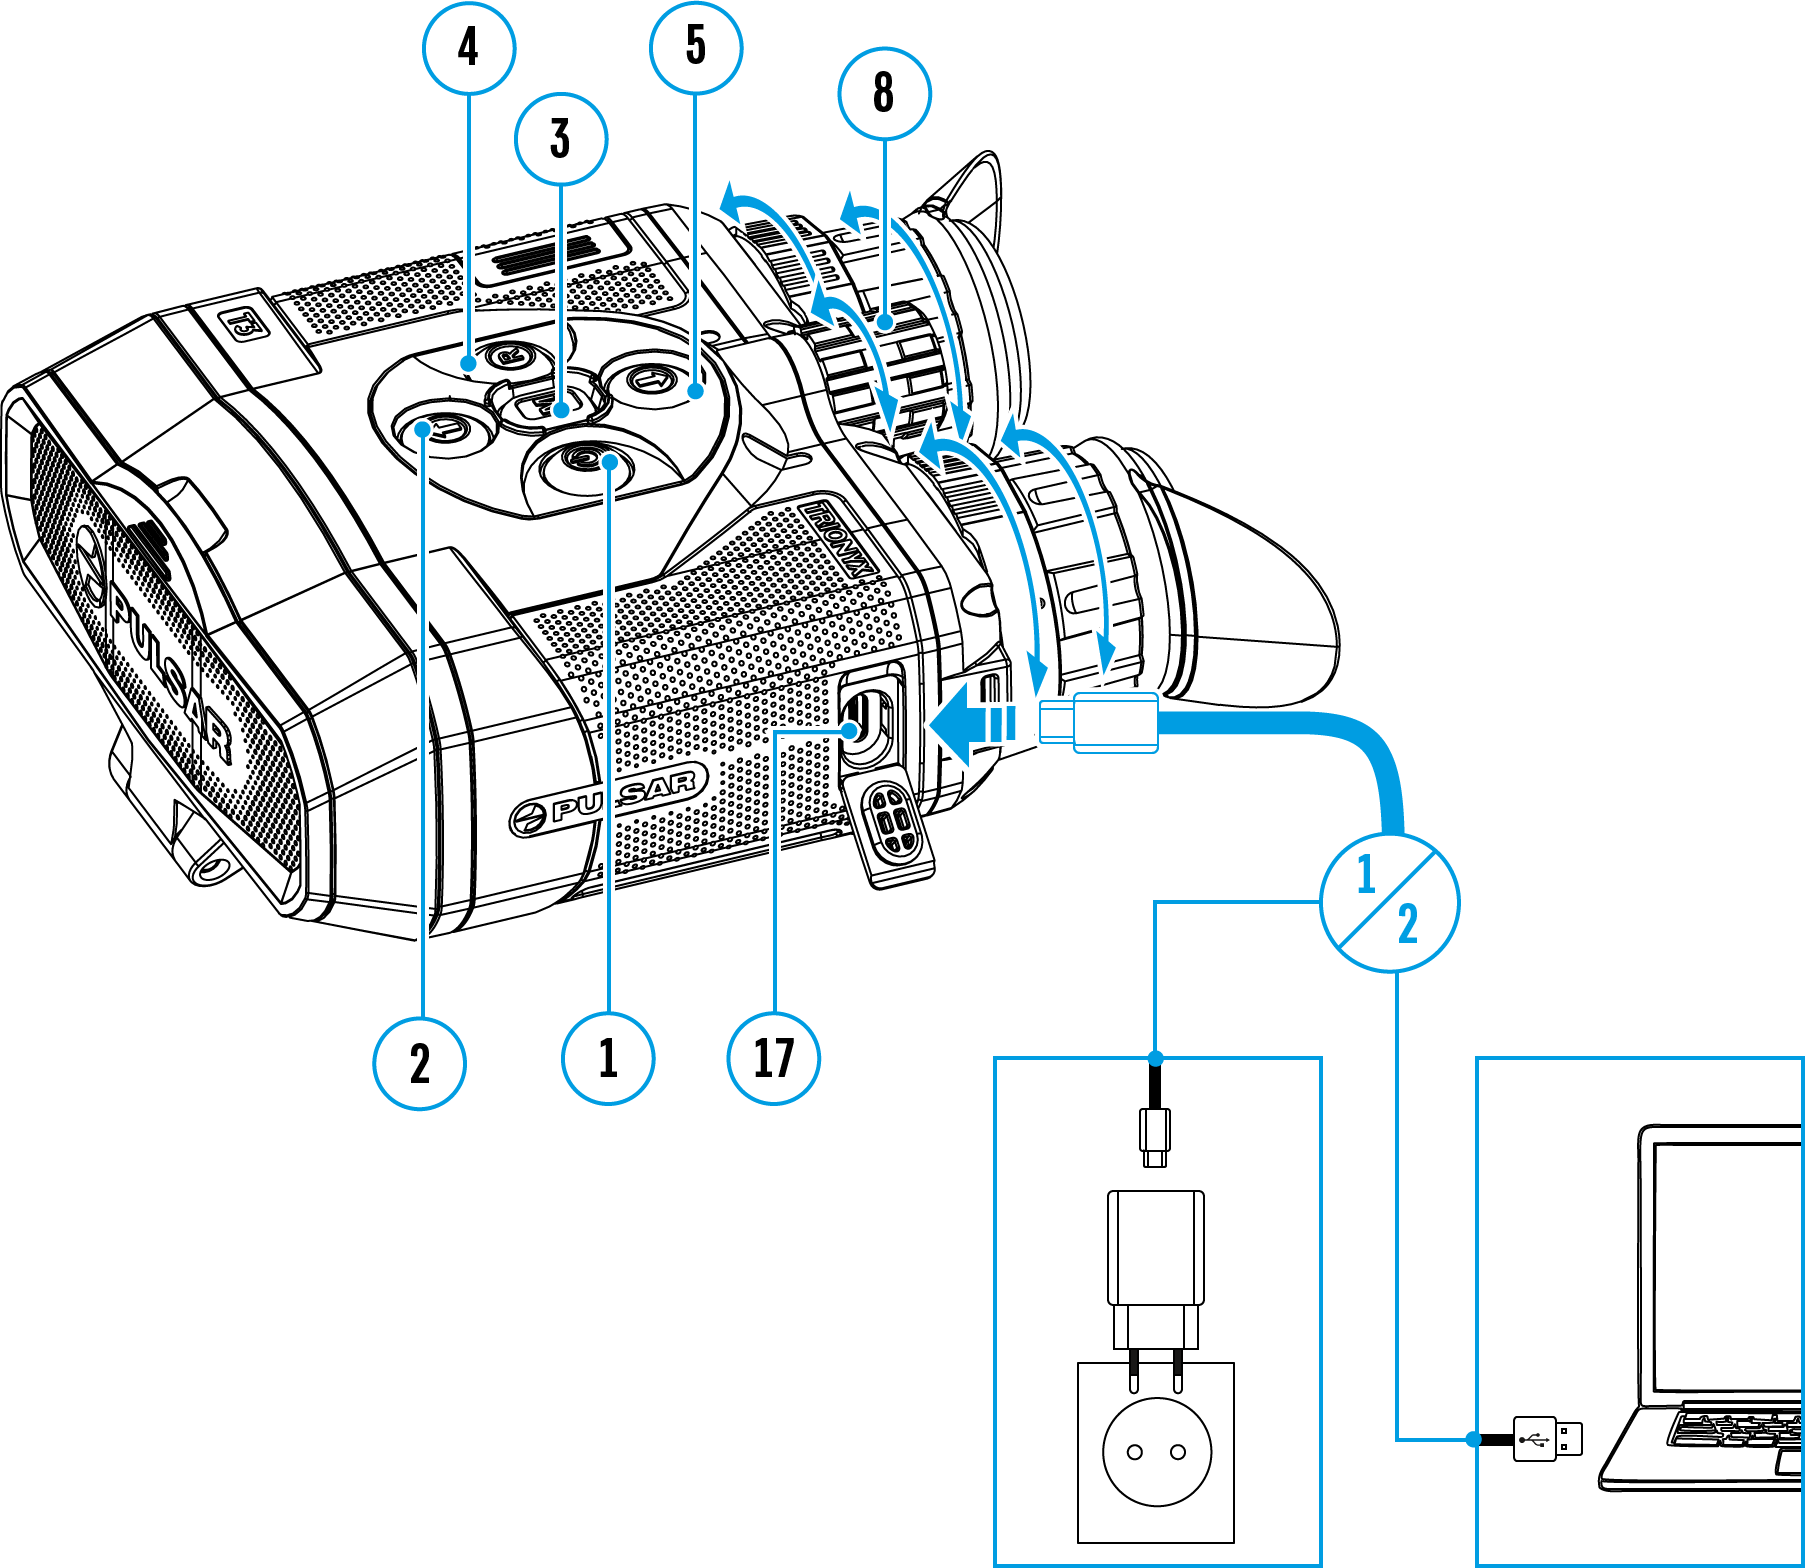
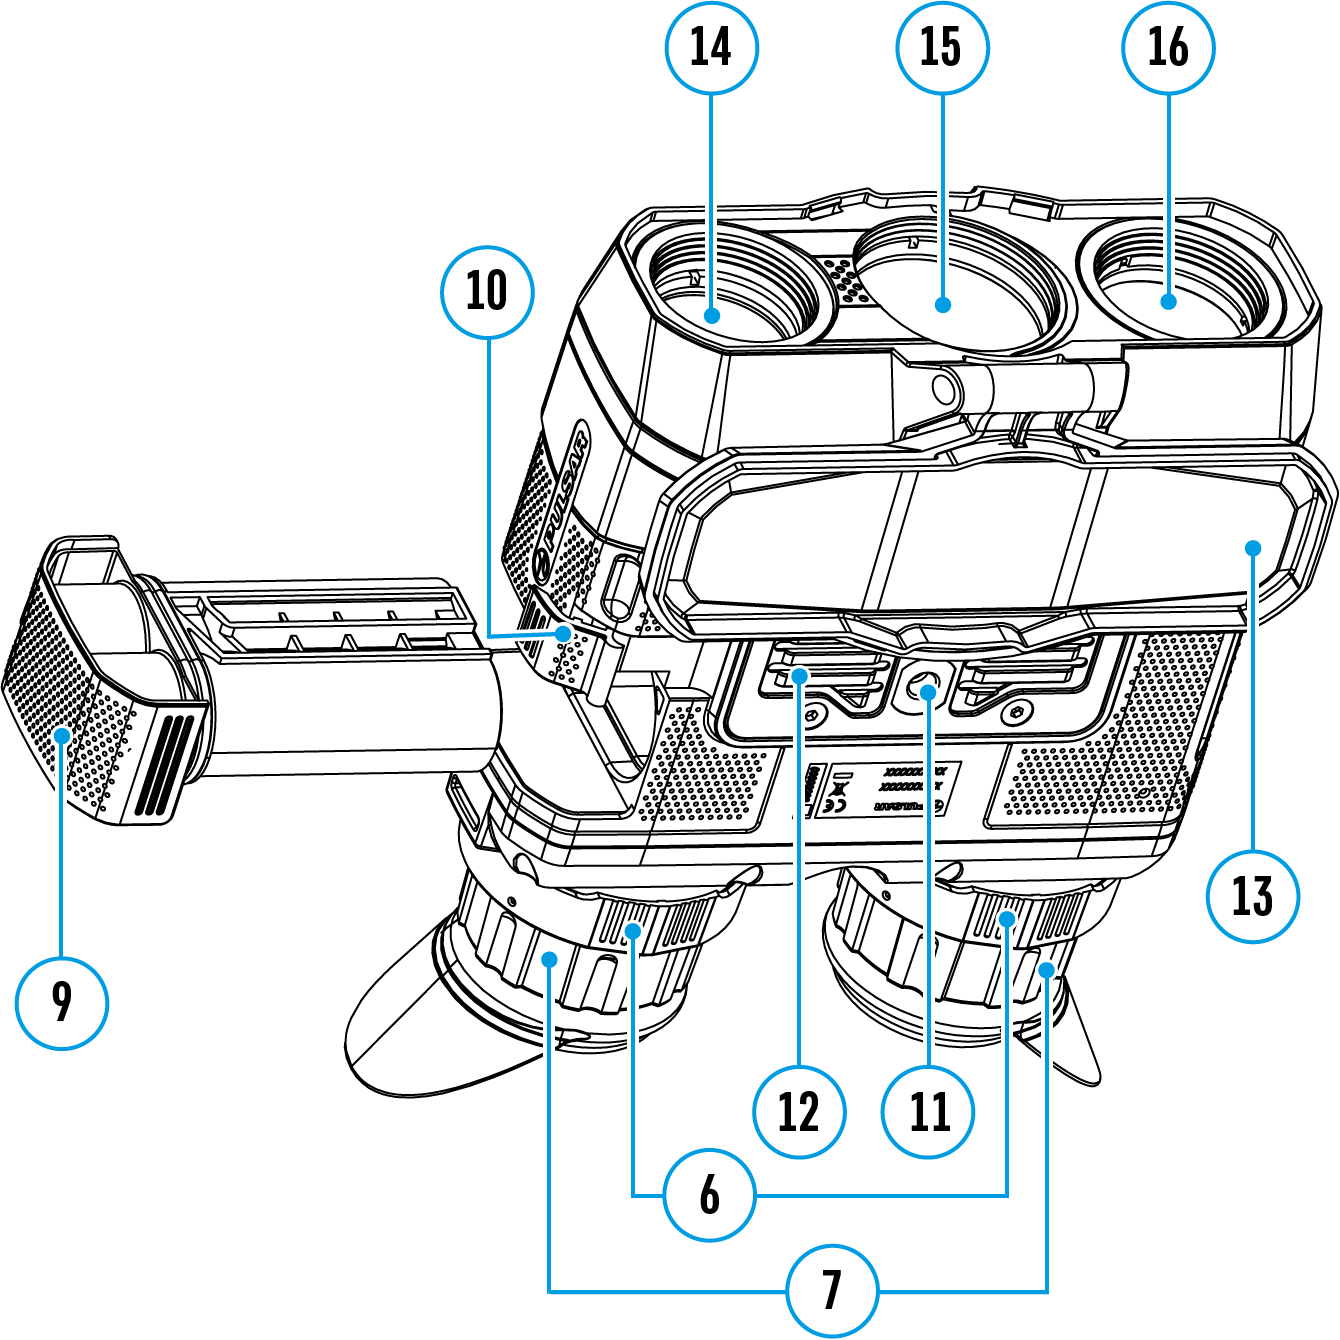
1. Open the lens cover (13).
2. Press the ON/OFF (1) button briefly to turn on the device.
3. Set the pupillary distance by squeezing the eyepieces together or pulling farther apart while holding the adjustment rings (6).
4. Get a sharp image of the symbols on the displays by rotating the optical adjustment ring of the eyepieces (7).
5. By briefly pressing the MODE (2) button, select one of the three operating modes: Thermal Imaging, Digital, Fusion.
6. For Thermal Imaging mode:
- Select the operation mode (Forest/Rocks/Identification/User) with a long press of the MODE (2) button. User mode allows you to setup and save custom brightness and contrast settings, as well as select one of the three modes as the base.
- Select the appropriate color palette with a long press of the DOWN (5) button or in the main menu (see the Color Modes section for details).
7. For Thermal Imaging and Fusion mode:
- Enter the main menu with a long press of the MENU (3) button and select the calibration mode: manual (M), semi-automatic (SA) or automatic (A) (see the Calibration Mode section for details).
- Calibrate the image by briefly pressing the ON/OFF (1) button (if the SA or M calibration mode has been selected). Close the lens cover when calibrating manually.
8. For Digital and Fusion mode:
- Rotate the lens focus knob of the digital channel (8) to focus on the visual target.
- To increase the quality of observation in low light conditions at night, turn on the built-in IR illuminator by briefly pressing the UP (2) button. Toggle between the IR illuminator power levels with long presses of the UP (2) button (see the IR Illuminator section for details).
9. Activate the quick menu by briefly pressing the MENU (3) button to adjust the brightness and contrast of the displays and smooth digital zoom (see the Quick Menu Functions section for details).
10. When finished turn the device off with a long press of the ON/OFF (1) button.
Warning! Do not point the device's lenses at intense energy sources such as laser emitting devices or the sun. It can damage electronic components in the device. The warranty does not cover damage arising from failure to comply with the operating rules.
Warning! The radiator cooling system (12) becomes warm during operation: this is normal and allows an increase in the sensitivity of the device. When the device warms up significantly, the warning message “Your device needs to cool down before you can use it” will appear on the display, photo/video recording and WiFi will automatically turn off. The device needs to cool down to continue using these functions.
 English
 German
 French
 Spanish
 Italiano
 English
 Lietuvių
