Step 1. Loosen the screws
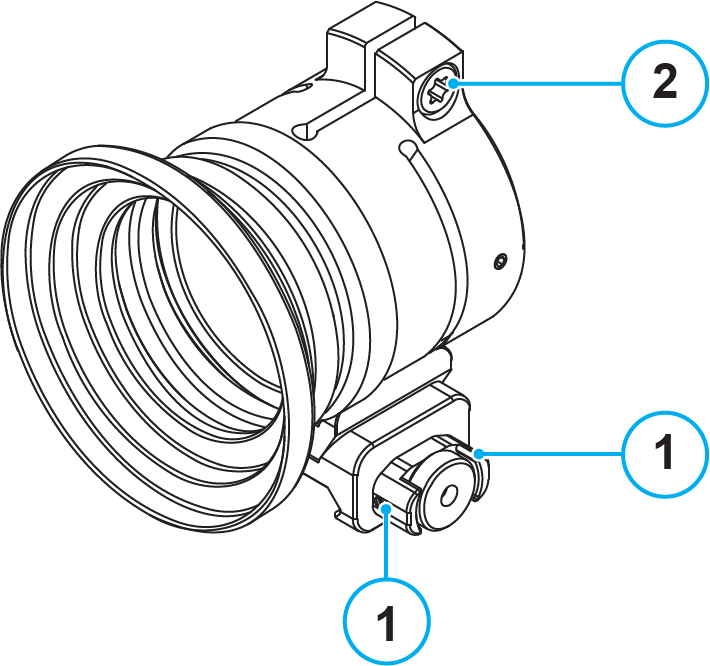
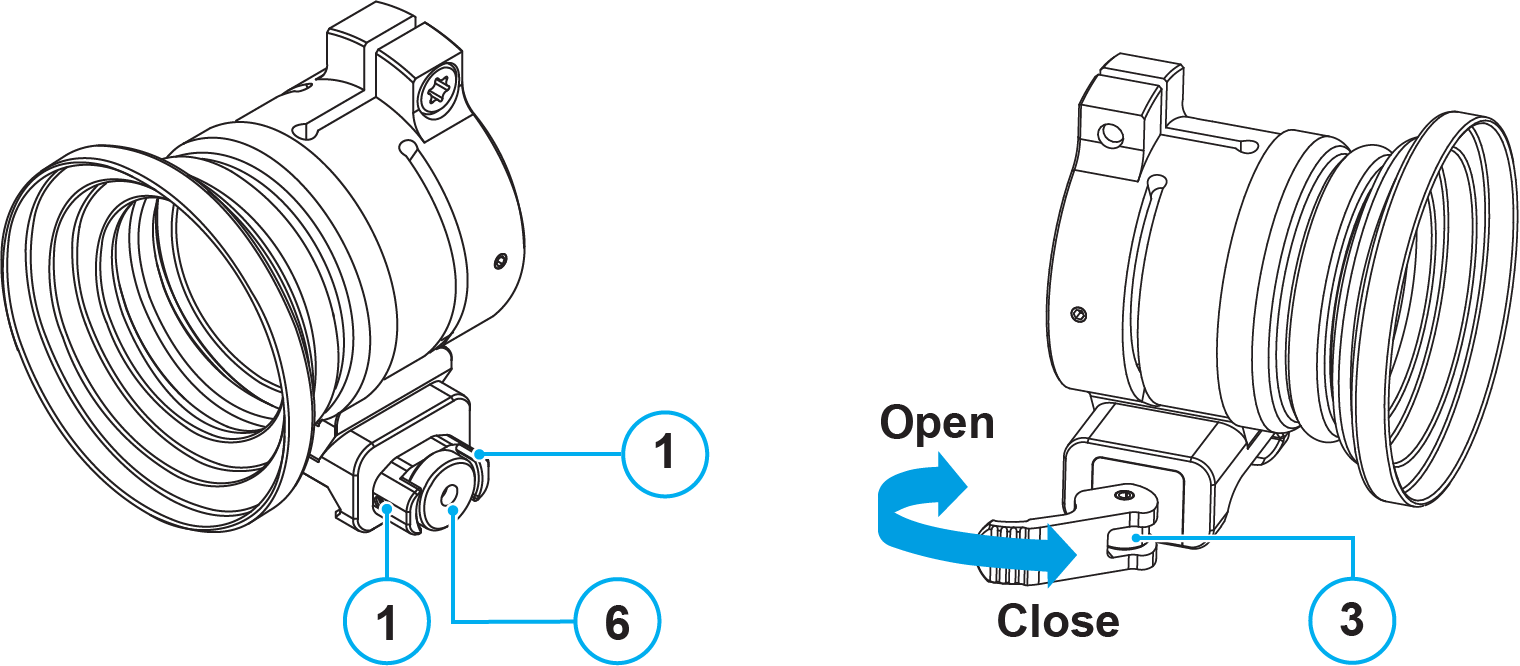
- Loosen the fixing screws (1) with a hex wrench S0.9.
- Loosen the screw (2) with a Torx T25 wrench.
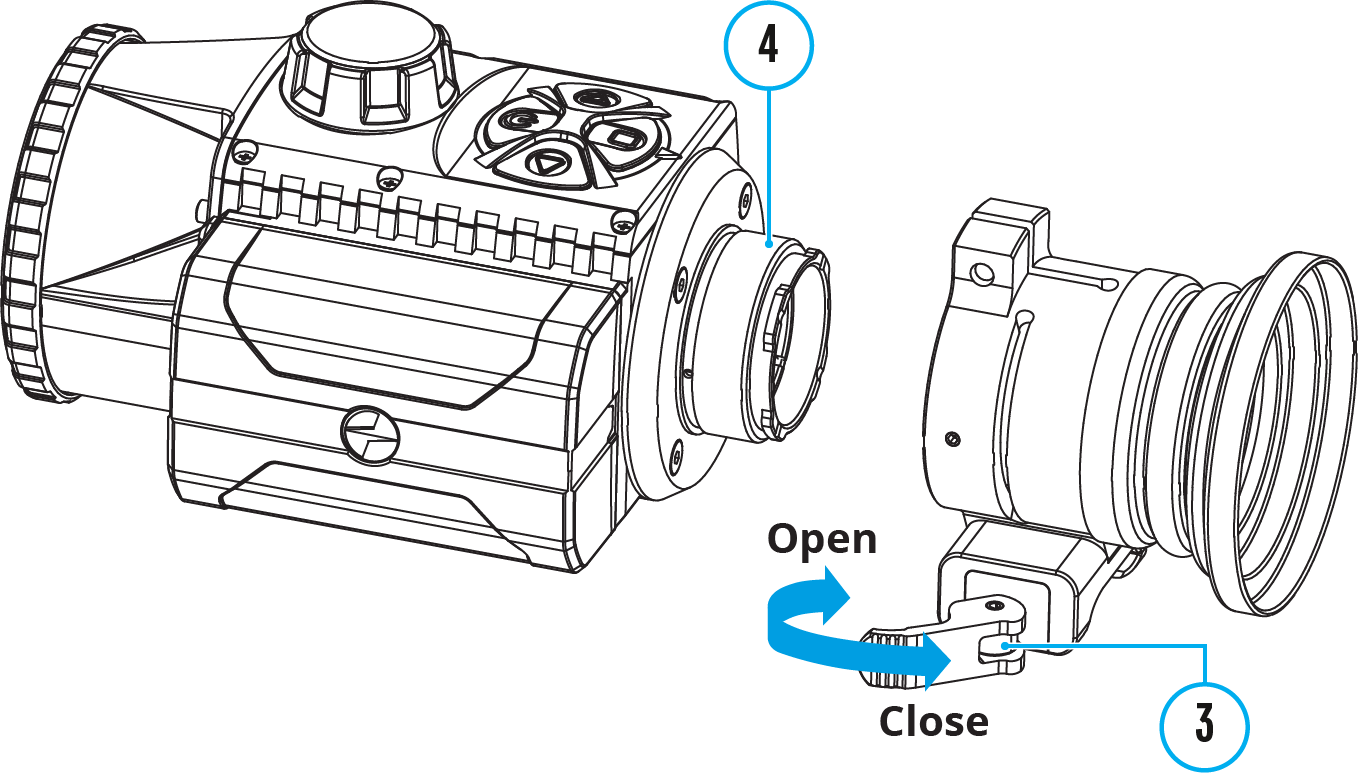
- Move the lever (3) to the OPEN position.

Step 2. Mount the adapter on the attachment
- Screw the adapter along the thread on the mount of the attachment (4) until the adapter is tight and secure with your thermal imaging attachment. To ensure the lever is in the correct position, rotate the adapter counter-clockwise until the lever (3) is on your left-hand side (see Figure).
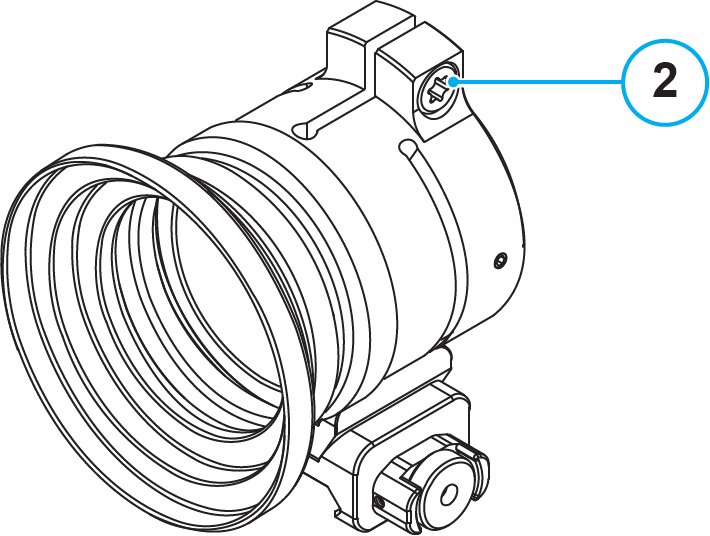
- Tighten the screw (2) until the ball joint in the adapter is tight.
Step 3. Mount the attachment with the adapter on the weapon

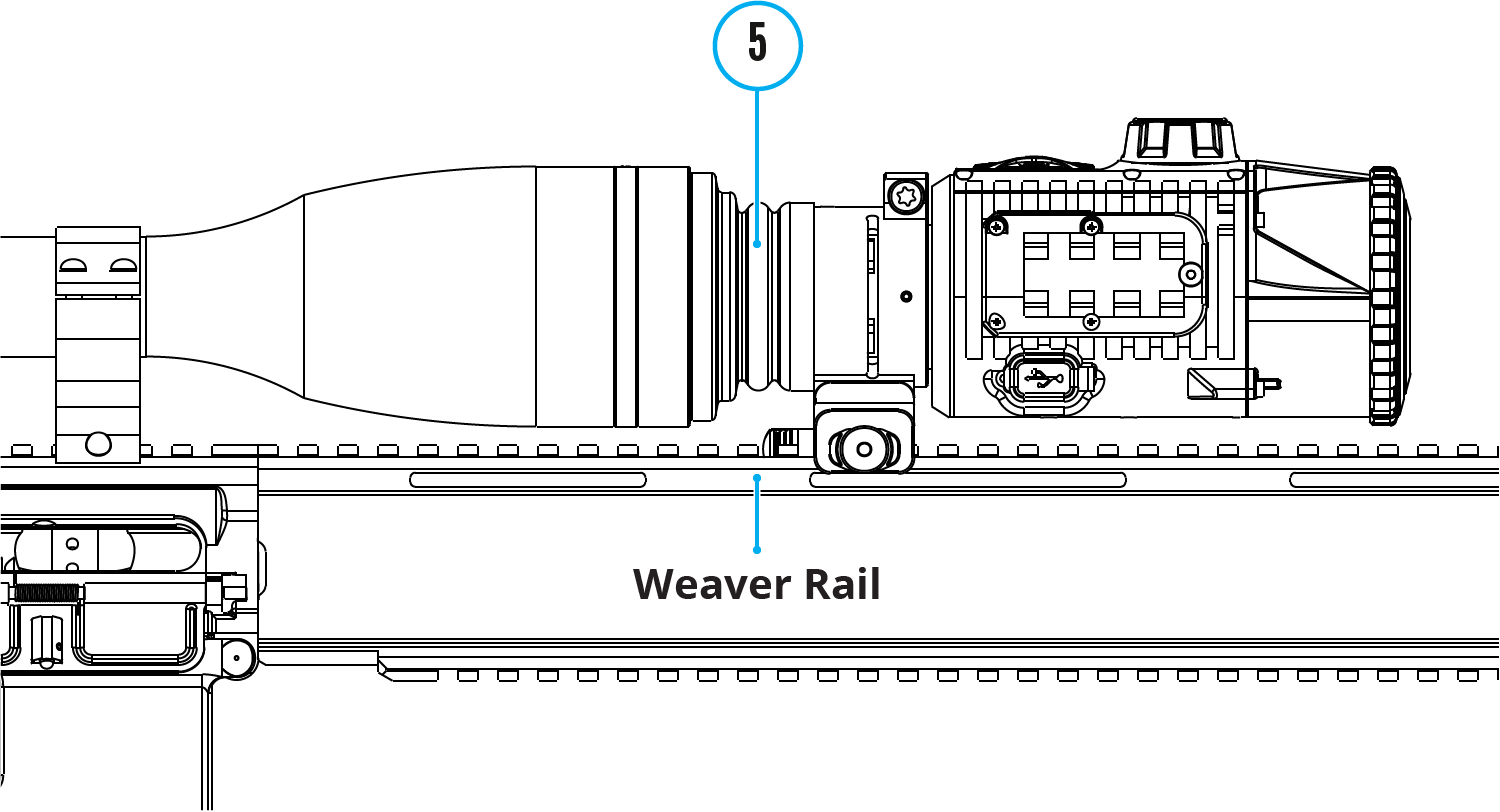
- Mount the adapter on the weapon rail (Weaver/Picatinny) in front of the riflescope’s objective lens. The adapter cover (5) should prevent external light sources from reaching the lens.
- Tighten the adjusting wheel (6) until the lever (3) requires mild-to-medium level of resistance to close. Tighten or loosen the adjusting wheel (6) as needed so the adapter does not feel loose.
- Move the lever (3) from its initial OPEN position to the CLOSED position.
- Tighten the screws (1) until they are tight and secure.
Step 4. Adjust the attachment position

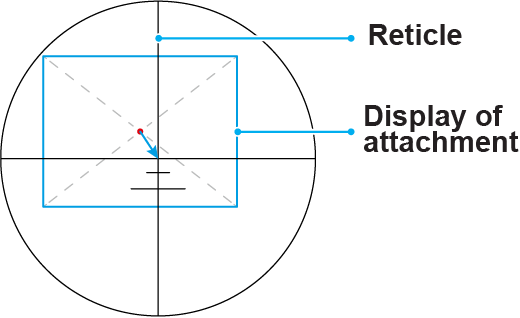
- Turn on the attachment.
- Align the display centre with the crosshairs of the riflescope reticle by tilting the attachment and observing through the eyepiece lens.
- Align the riflescope’s aimpoint with that of the attachment by rotating the attachment clockwise or counterclockwise.
- Having achieved the optimal attachment position, finally affix the attachment by tightening the screw (2) until it stops. The clamping force should be 8 Nm (7.81 in-lb) (use the torque screwdriver to check).

Adjust the adapter height

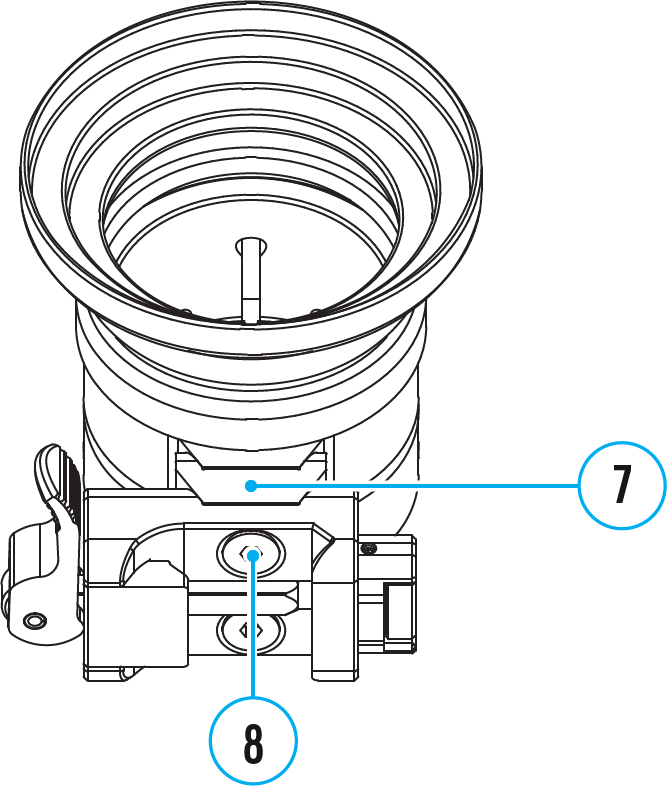
To mount the adapter on low profile riflescopes, remove the rail spacer (7):
- Unscrew the screws (8) using a hex wrench S2.5.
- Remove the rail spacer (7).
- Fasten the adapter mount using the supplied screws M4x10.
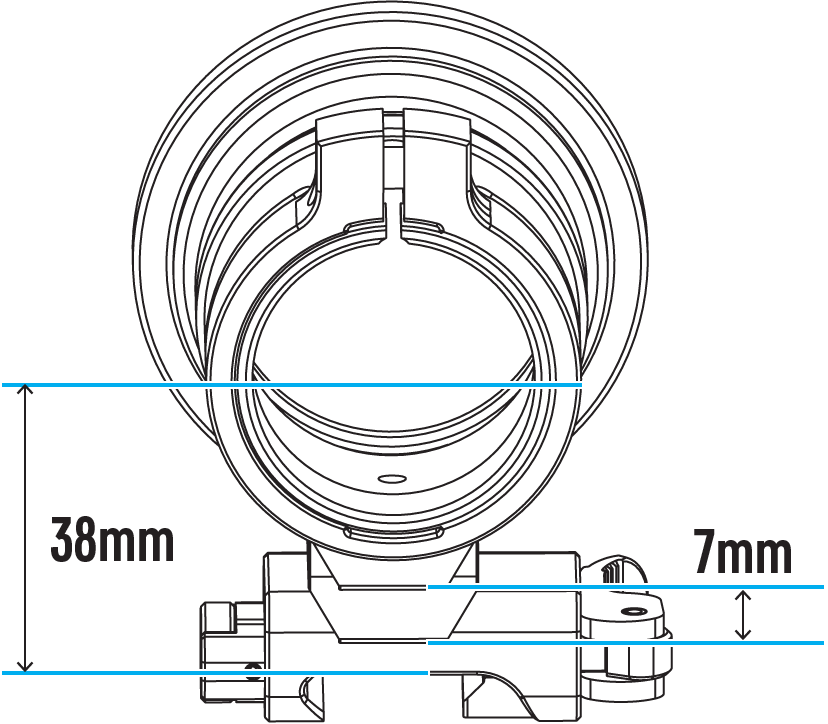
To further secure the adapter, it may be necessary to remove the screws (8) and apply Loctite to them per the manufacturer’s instructions. Loctite fully cures in 24 hours.
 English
 German
 French
 Spanish
 Italiano
 English
 Lietuvių


